
We promise mountains and wonders, but a drywall partition won’t silence the neighbors if the rules of the trade are not followed. A misplaced screw or a poorly done joint, and fragility sets in, affecting the finishes. The metal tracks, on the other hand, leave no room for approximation: a tiny misalignment, and the crack lurks, hidden in the shadows of time.
Every detail matters: the cut must be clean, the order of operations well thought out, and the choice of accessories considered. Poor planning means wasting time, chasing corrections, and increasing the risks of defects.
Read also : Tips and Practical Advice for Successfully Completing Your DIY, Decor, and Gardening Projects
What you need to know before starting to install a drywall partition
Installing a drywall partition requires serious preparation. Before taking out the tools, you must examine the space from every angle: room configuration, floor type, wall plumbness, intended use of the separation. A partition is not meant to support heavy furniture or risky fixtures: if elements like shelves or a radiator are to be placed, you need to think about the necessary reinforcements from the start.
Work on drywall partitions is governed by regulations, especially during renovations. Safety rules apply without discussion, particularly if electrical networks or plumbing are involved. The flatness of the support directly affects the layout, the type of tracks to use, and the thickness of the structure. An inaccurate measurement, and the entire drywall partition project wobbles.
Related reading : How to Effectively Use Your ANCV Holiday Voucher at Decathlon: Tips and Good Deals
Before cutting any panel, each step must be clarified: marking on the floor, checking plumbness, anticipating insulation if necessary. Installing a drywall partition requires method and precision. There are several types of panels: standard, moisture-resistant, high hardness, for different uses. The choice depends on the room: a bathroom is not equipped like a living room.
To delve into each phase, the practical guide on Les Embellies Déco details the technical aspects, from assembling the framework to managing joints, not forgetting the specific points of vigilance for each drywall partition project.
What tools and materials to choose for a hassle-free project?
To successfully create a drywall partition, relying on reliable equipment is essential. The quality of materials and the precision of actions are the guarantees of a controlled project. For dry areas, standard drywall does the job; in humid areas, moisture-resistant models should be prioritized. In high-traffic areas, opt for high-hardness panels, which are more resistant to impacts.
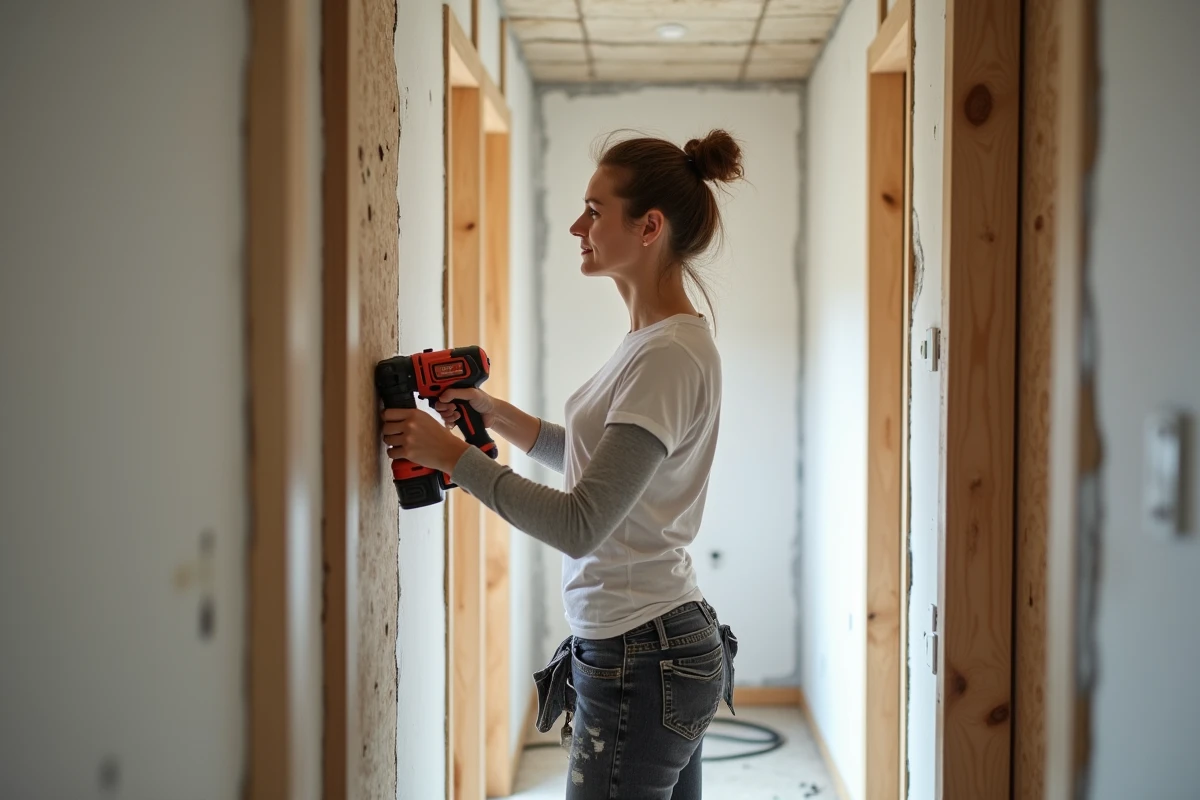
The core of the partition rests on a metal framework. Tracks are fixed to the floor and ceiling, then connected by vertical studs at the height of the room. For cutting, a nibbling tool or straight shear ensures a clean result. In terms of tools, a screwdriver is essential for securing the panels, while a bubble level or laser level guarantees perfect plumbness.
For those looking to enhance comfort, insulation should not be overlooked: fiberglass or rock wool is installed between the studs before closing with the second panel. Here are the tools to keep on hand for efficient work:
- tape measure and chalk line;
- drywall saw or utility knife;
- mason’s square;
- drywall screws;
- joint tape and putty knife.
The wide choice of drywall materials opens the door to personalized solutions: thermal insulation, mechanical resistance, adaptation to humidity… Each situation has an appropriate response. Taking the time to select each component ensures a robust and discreet partition, capable of transforming the space without a hitch.
Steps and tips for successfully installing your drywall partition, even as a beginner
Preparing the site: rigor above all
Before any installation of a drywall partition, you must accurately mark the location of the future wall on the floor and ceiling, using a laser level or chalk line. Everything relies on the accuracy of measurements and checking plumbness. This step conditions the entire interior design project. The tracks are placed on the marked points and then carefully screwed in. The metal framework takes shape, stud by stud, strictly adhering to the recommended spacing for drywall panels.
Installation, insulation, and conduit passage: method and anticipation
Consider thermal and acoustic insulation: insert the appropriate insulation before closing the partition. If electrical conduits need to pass through, plan for them during the framework installation. Each cut must be clean to maintain the integrity of the plaster. When it’s time to screw in the panels, start with the ceiling, then tackle the wall. Panels with tapered edges facilitate the finishing of joints.
To avoid missteps, here are some reflexes to adopt:
- Align each element with the laser level.
- Tighten screws without crushing the drywall.
- Apply the compound evenly on the joint tape.
Taking care of the finishes for a professional result
Once the compound is dry, simply sand the joints delicately. From screwing to finishing the joints, every action contributes to the success of the project. A well-installed drywall partition offers impeccable insulation and comfort while affirming a clean and flawless design.